Expert’s 10 Tricks on How To Attach Floor Joists To Sill Plate
Consider securely attaching floor joists to a sill plate to ensure a strong and stable foundation for your construction project.
Laying a solid foundation for your home is like creating the base of a great relationship; lay the groundwork first, and everything else will fall in place.
If you are an aspiring or seasoned DIYer, growing as a carpenter, or looking to start your homebuilding skills, learning how to attach floor joists to a sill plate is the essential first step.
This complete guide will lead you through the step-by-step process from the knowledge base, what you should know, how to secure it properly over the years, and more.
You will equip yourself to decide on one of the house-building essentials with confidence and experience. Build Up Your Foundation Today to Make Sure Your Home Lasts a Long Time.
Understanding To Floor Joists to Sill Plate

What Are Floor Joists and Sill Plates?
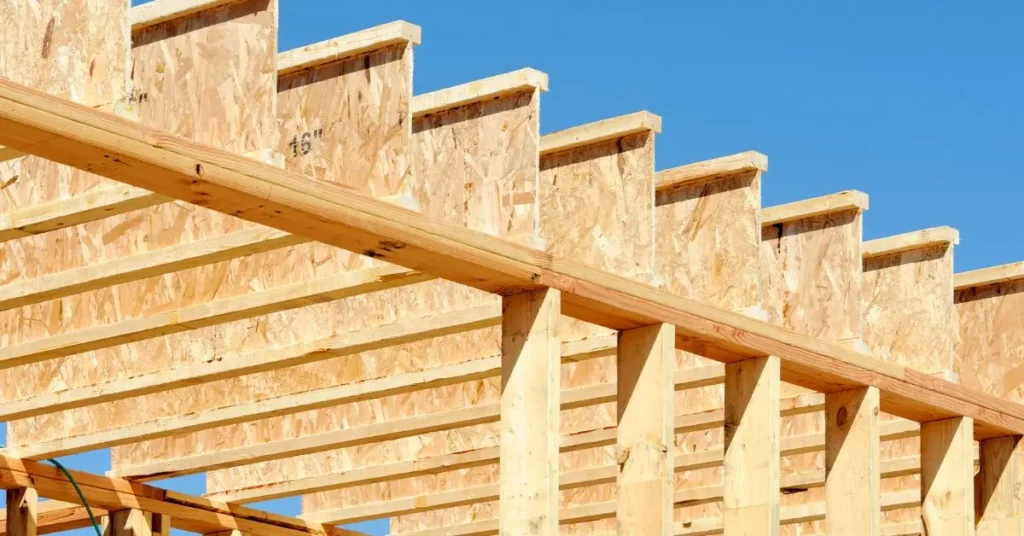
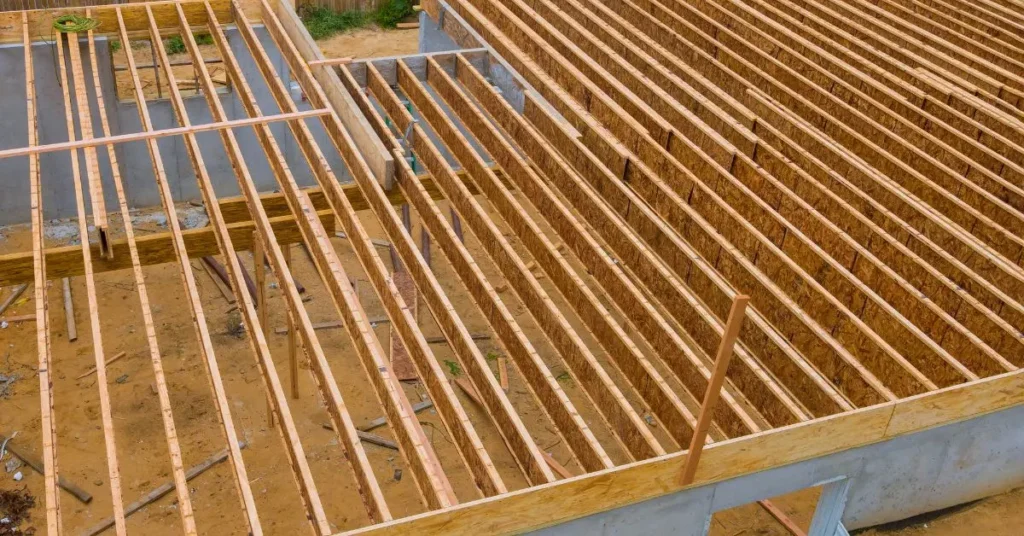
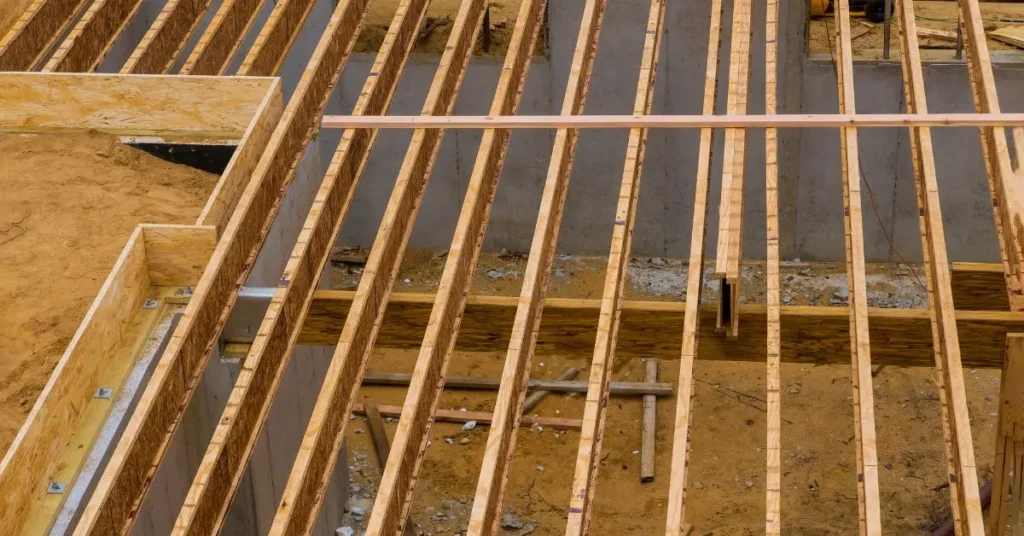
The framework, including the floor joists and sill plates, is the heart of most houses’ structures. Floor joists are horizontal structural morphemes that support whatever is above them (the floor, the furniture, and the people).
Depending on the project’s needs, several joists, including solid lumber, engineered joists, or I-joists, may be used.
Conversely, sill plates are lumber directly on top of the foundation walls. They act as an essential spacer, distributing weight and stabilizing the floor system.
Sill plates are usually made of pressure-treated wood with a degree of protection from moisture. And rot to remain stable over time, which is especially important in termite-prone areas.
Why Proper Attachment Matters
Building a house of cards, all comes down to base. The same applies to attaching floor joists to sill plates. You need to attach them correctly, not only for structural stability and load-bearing but also because timber can rot if left exposed to moisture. Which could affect the integrity of the building overall.
Following the proper practice also makes it more durable and safer in the long run, saving you time and money to repair or replace them. Additionally, it helps avoid potential legal problems as the building codes are followed.
Tools, Materials, and Preparation for Attach Floor Joists to a Sill Plate
Tools You’ll Need
This is one of those DIY projects that will go smoothly with the right tools. So, make sure you have the essentials listed before getting started. It would help if you had a hammer to drive nails for fastening materials and a drill to set the holes accurately.
You will also need a level to ensure your work is perfectly horizontal or vertical and a framing square to help you create accurate right angles, which are critical for uniformity and accuracy in your project.
If you want to speed things up and make your job less stressful, get some advanced tools. To save time, you can use laser levels, which project a straight line or plane over a distance, providing orientation.
Also, a pneumatic nail gun can make the nailing materials together much faster. These tools cost a bit more initially but are worth every dime. Considering the resource efficiency and ease they introduce to your project.
Materials Checklist
When sourcing materials for your project, begin with joist hangers, fasteners (and protective coatings in moisture-prone locations).
They afford the stability, strength, and durability required for long-term support. Choose between nails or screws based on long-lasting and convenience. While nails might be easier to use, screws tend to hold better.
Remember moisture barriers and insulation materials to stay protected from dampness & keep your project energy efficient. These will protect your structure from damaging water and help keep the space comfortable as it minimizes unwanted heat transfer.
Safety First
Project safety before anything else; your 50 topics of the month are not worth any risk, so please always be cautious to ensure your protection.
Use Personal Protective Equipment (PPE), such as gloves, goggles, and ear protection, to protect yourself from injury. Make sure you are familiar with safety protocols for power tools. So, that when you use them, you know how to operate them properly and safely.
Next, inspect your workspace for potential dangers—such as lousy footing or rubbish—that could result in a slip. Keep your workspace bright so that you can see what you’re doing and avoid clutter that could lead to trips or falls.
Safety is a priority, and taking the time to do things safely will ultimately lead to better results. Because accidents can significantly compromise project success.
Preparation Before Installation of floor joists to sill plate

Preparing the Sill Plate
Ensure the sill plate is level and bolted to the foundation before running floor joists. First, confirm the sill plate’s level using a spirit level and raise or lower it until any unevenness is removed to prevent structural problems down the road.
If a sill plate is not level, it can throw off the entire building, so precision is key. Once it is leveled, secure this part into the foundation with proper anchors or bolts. Reference building codes or experts to find the best materials and procedures for your project.
Use durable sealants or water-repellent finishes to improve moisture resistance and protect the sill plate. Some services even offer extra termite shields to prevent another infestation.
Every single one of these steps is necessary for protecting your investment and the stability and longevity of your building; you will rest easy knowing that your structure has a stable and solid foundation.
Measuring and Marking the Layout
Joist spacing and layout are litmus tests where precision is paramount. Excess gaps or adjustments can cause a building to lose its shape, which can cause problems later on.
Use chalk lines or marking templates to indicate where each joist fits, ensuring proper placement according to building codes and standards.
Focusing on such systemized detail strengthens the building and simplifies and accelerates its installation — making it highly cost-effective and efficient.
By at least taking proper measurements and aligning the joists, you may save a lot in the long run in time and resources, not to mention peace of mind; ultimately, that counts.
Top 7 Steps to Attaching Floor Joists to a Sill Plate
Positioning the Sill Plate
First, ensure the sill plate is level and bolted to the Foundation. This step is necessary to create a stable, reliable foundation for your floor joists.
Check the plate’s evenness using a spirit level and ensure the anchor bolts are tightened. Proper placement of the sill plate facilitates installation later, eliminating problems down the road and enhancing the building’s overall framing stability.
Investing time into compressing this as effectively as conceivable will pay dividends in the strength and longevity of your build.
Marking Joist Locations
Whether you are marking where the joists will be is critical to maintaining consistent spacing and alignment, and it ensures that your project remains structurally sound.
Assuming you handle everything appropriately using an excellent measuring device and rechecking your calculations, every joist will sit properly in its location.
This special care ensures the even distribution of loads and enhances the structure’s stability and safety. Accuracy now makes for a more even structure and also helps avoid problems down the line with essential repairs or inspections.
Installing Joist Hangers
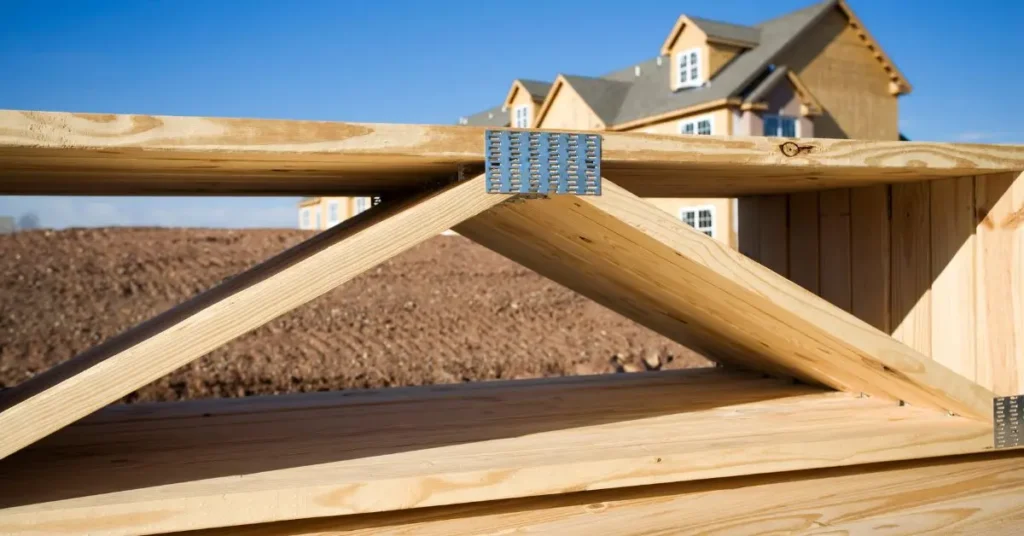
Choosing the proper joist hangers is critical for ensuring your building project’s secure fit and stability. These metal brackets secure both ends of wood joists, so selecting the right size and type for your project is essential, given its weights and measurements.
In plumb, properly nailed or screwed hangers; Check with a level, and if they are not, do some shimming [between the joist and hanger] or shim [the hangers]. It serves as a guide for the proper connection of joists to the sill plate — an error here can destabilize or even cause structural failure in the long run.
Check all the hangers regularly to ensure they stay in place and are rust-free if they are used outdoors or in damp areas.

Cutting and Preparing the Floor Joists
Cut and measure floor joists that fit like a box. Measure with tape, then strike your joists again before cutting. Sand or use a product on the edges to avoid splinters, which are always dangerous, and make it more durable (see below to prevent the wood from external damage).
Ensure that spacing is consistent and the surface is level; the joists should slide into the hangers without gaps or other alignment issues. This level of precision can make all the difference in how well your granny flat’s flooring project holds up over time.
Securing Joists in Hangers
With all joists inserted, carefully slide them within the hangers to ensure they are straight and have equal spacing.
The joists are securely attached to the hangars using quality fasteners, so there is no movement or slippage during everyday use.
This ensures that your floor is secure and safe from shift and helps increase the strength and lifespan of the overall construction. When done right now, it will create a long-lasting and stable floor to last a lifetime.
Adding Reinforcements
Blocking or Bridging — It may provide the stability (like on long runs or soft spots) you need for structural integrity. They distribute the loads evenly and prevent joists from moving, sagging, or structurally failing over time.
Blocking and bridging add to the overall strength of the floor system, which provides peace of mind regarding how durable and weather-resistant your build will remain.
Such a manner is significant in areas where regular footfalls are heavy or high traffic loads are exposed frequently; it accommodates necessary safety features to ensure a longer life span of the structure.
Inspecting the Structure
After your installation, inspect the entire assembly to ensure everything is level and secure. Inspect each element, from the ground up to the roof, for compliance with specifications. To ensure the building remains safe and solid, fill all gaps, misalignments, or loose-fitting areas on time.
Inspect All Joints and Supports to See if Tight or Aligned An extensive examination ensures the work performed is done right and prevents problems in the future, peace of mind and a well-lived structure.
Advanced Techniques for Longevity and Durability
Moisture Protection Strategies
Waterproofing prevents your structure you are protecting from water-earthquake damage, and the era of use can be increased.
These coatings help protect against moisture invasion that can cause mold problems, rot, and degradation over time.
Crawlspaces deal with preventing moisture build-up and can have insulation, or vapor barriers as they are often called, which works by keeping unwanted heat in the house from escaping.
These barriers help keep the temperature in the building relatively stable and reduce heating & cooling expenses. This prevents condensation and damage to the building materials and a better indoor climate.
Preventing Wood Warping and Shrinkage
Kiln-dried wood will reduce the likelihood of warping or shrinkage as time passes. Kiln-drying is used in the wood industry to eliminate excess moisture from the timber.
Mike W. This is done by controlling the environment of the wood to regulate temperature, humidity, and airflow. This makes the wood much more robust and able to resist problems such as warping or uneven surfaces.
Getting the wood used to its specific environment before installation is essential. This is referred to as the acclimatization period, which allows the wood to readjust to the climate of your space slowly. This helps to eliminate potential issues and extremes, limiting the risk of expansion or contraction.
Following these methods will enable the wood to perform and remain in better shape for longer, keeping its aesthetics and structural integrity intact as it ages. This technique can be excellent for projects that need to look precise and attractive, like fir flooring, cabinetry, or fine furniture.

Ventilation and Airflow
The importance of having good space below floors cannot be overstated, as it prevents moisture accumulation and condensation damage that can threaten the building envelope.
Over time, condensation can present many problems with mold, wood rot, and structural weakness. Do you know, for example, that mold affects the structural parts and jeopardizes the health of those who live in it (such as respiratory problems and allergies)? First, wood rot can significantly deteriorate the foundational components of a building and require expensive repairs or even structural collapse.
Good crawlspace ventilation is one way to reduce these problems. This means using vents to encourage airflow and incorporating vapor barriers to minimize moisture.
In addition, periodic inspections and maintenance can help identify potential issues before they cause serious problems, allowing for timely interventions.
These precautionary steps help safeguard your structure against possible harm and maintain a healthy environment for all inhabitants. All of these help extend the life of the building and keep its occupants safe and secure.
Using Metal Connectors for Earthquake or Hurricane Zones
More metal connectors are used for reinforcements in high-risk areas, leading to more excellent stability and peace of mind for property owners.
These robust connectors, typically made from premium steel or other sturdy materials, are designed to resist great forces of nature while providing modulus against natural disasters such as earthquakes, hurricanes, and tornados.
For instance, these connectors also dissipate and share seismic energy in the event of an earthquake, minimizing the potential for structural damage.
Thankfully, whenever a hurricane or tornado strikes and wind forces are extreme, they provide fortitude to endure through the winds. Installing these reinforcements will help protect your investment and those in the building.
This helps make it a good solution for residential and commercial properties as it can help boost the building’s durability and strength, which means there is less chance of repair costs in years to come and potentially increasing property prices, too!
Inspection and Quality Assurance for Floor joists to sill plate
Checking Structural Integrity
Use Schedul Repair fasteners and advise on maintaining doctrinal integration. Inspect each connection point for any wear, corrosion, or loosening that could compromise stability.
Another important aspect is to inspect all damage-prone places or components like high-stress zones or locations exposed to severe environmental conditions. Finding and fixing problems early on, like replacing a rusty bolt or tightening a loose joint, will help us avoid major issues later.
Such measures provide security to your building and help it last a long time. Such services make the structure last and can give peace of mind to knowing that all potential risks have been avoided.
Maintaining a record of maintenance activities can help keep track of the structure’s condition over time, which can be valuable in planning for future maintenance and repairs.
Building Code Compliance
Nail down the most common requirements for joist-to-sill connections based on your area, as these are critical components of a building’s structural integrity.
These connections ensure the load from the floors and walls transfers to the foundation properly, allowing stability and security. Learning about local building codes will ensure you abide by the law and make your structure safer and last longer.
Following these regulations prevents the possibility of construction issues, which can lead to costly repairs years down the line. You may also gain ideas from a local building inspector or a structural engineer.
They would provide best practices and unique solutions per project-specific needs. They would also know the latest materials and methods to improve durability and efficiency and withstand future challenges and market trends.
Proper connections between the joists and sills will add considerable strength and durability to your project, whether you are building new or remodeling an existing structure.
Common Installation Errors to Avoid
Be careful to avoid ending up with misaligned joists or hangers; this is the time to double-check all measurements and build things properly. Which involves making sure that all screws are only secured after ensuring they are level, vertical, and measuring twice.
Proper alignment is essential to keeping the structure sound and stopping future problems of sagging floors or floors that cannot hold a load. If enough of the fasteners are secure and provide the necessary support but have yet to be over-tightened or under-fastened to a point where they can quickly become loose fittings or crack apart, then aligning will not be an issue.
Think about the type of fasteners to use where you are ensuring it fits their fit and environmental conditions. Reconditions examining your work and then making corrections when needed, like tightening loose screws or adjusting pieces into alignment as necessary, will stabilize your structure so that it is safe and dependable during the long haul.
Moreover, you can record all the measures and adjustments that will help troubleshoot a problem in the future.
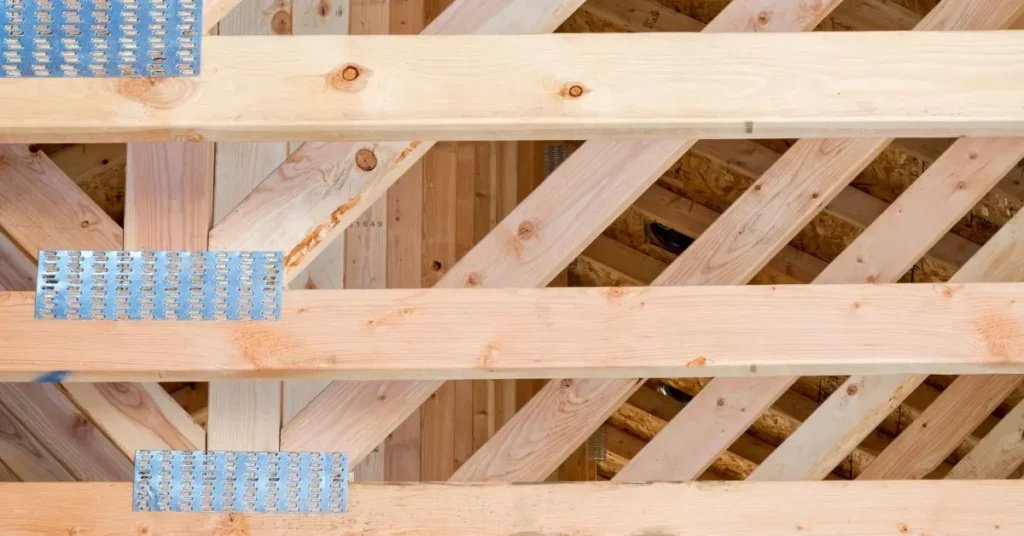
Expert Tips and Best Practices
You may need to spend a lot, but you do not have to worry too much about maintenance, as your investment in quality materials for your home will save you a lot of money in the long run.
Selecting lasting materials upfront will minimize repair costs over time, saving you plenty in the long run of your project. Regularly inspecting your structure is essential because it bri.
Many things forward that might become serious problems if not taken care of promptly. Build longevity and safety by taming minor repairs before they become costlier overhauls.
The next important step is to modernize the toolbox, as there are advanced tools that speed up development and allow performing tasks more accurately.
Modern tools have the advantage of efficiency and accuracy, which can significantly raise the quality of your deliverables, save labor hours, and provide results that stand up to none.
Moreover, for complicated projects, the guidance of a structural engineer is essential. Their experience gives you peace of mind with a tailor-made solution designed specifically for you. It will ensure that your project is structurally sound while giving correct functionality and aesthetics.
Conclusion
Attaching floor joists to a sill plate is one of the fundamentals of construction and home improvement. However, you can do that by following the steps in this guide. As always, there is no substitute for preparation, precision, and attention to detail.
You are using proper tools, materials, and techniques to establish a solid foundation for your home-building skills that could be improved, seek the advice of those with more experience, and always look for ways to learn more.
Happy building!
Frequently Asked Questions
Pressure-treated wood is famous for sill plates due to its moisture resistance. Based on your project's specific needs, consider solid lumber, engineered joists, or I-joists for joists.
Mark joist locations accurately using a framing square and measuring tape. Follow building codes and guidelines to ensure even spacing for structural stability.
It's not recommended, as reused materials may have reduced strength and reliability. Invest in new hangers and fasteners to ensure the highest quality and safety standards.
While moisture protection may seem unnecessary in dry climates, it's still advisable as conditions can change. Protecting your structure from potential water damage is always a wise investment.
Consider using additional blocking or bridging for added support. Consult a structural engineer for custom designs and reinforcements tailored to your needs.
Related Posts
-
 30 Dec 2024 RemodelSimple & Effective: Basement Bathroom Plumbing Diagram
 -
 30 Dec 2024 RemodelCan I Change the Shower Head in My Apartment? A Quick Guide
 -
 27 Dec 2024 RemodelHow to Fix Kitchen Drawers That Fall Off Track: Unlimited Guide
 -
 15 Dec 2024 RemodelHow to Raise a Shower Floor: Essential Tips
 -
 15 Dec 2024 Remodel70s Kitchen Remodel Before and After Expert Tips
 -
 14 Dec 2024 RemodelThe Ultimate Guide to a Raised Bathroom on a Concrete Slab
 -
 30 Nov 2024 RemodelAverage Kitchen Remodel Cost: Unlimited Tips
 -
 25 Nov 2024 RemodelRunning Romex Through Floor Joists: A Comprehensive Guide
 -
 22 Nov 2024 RemodelDuctwork Between Floor Joists: One Easy Ways to Installation
 -
 21 Nov 2024 RemodelFloating Floor Meets Exterior Door Threshold: Expert Tips

