Running Romex Through Floor Joists: A Comprehensive Guide
Table of Contents
Toggle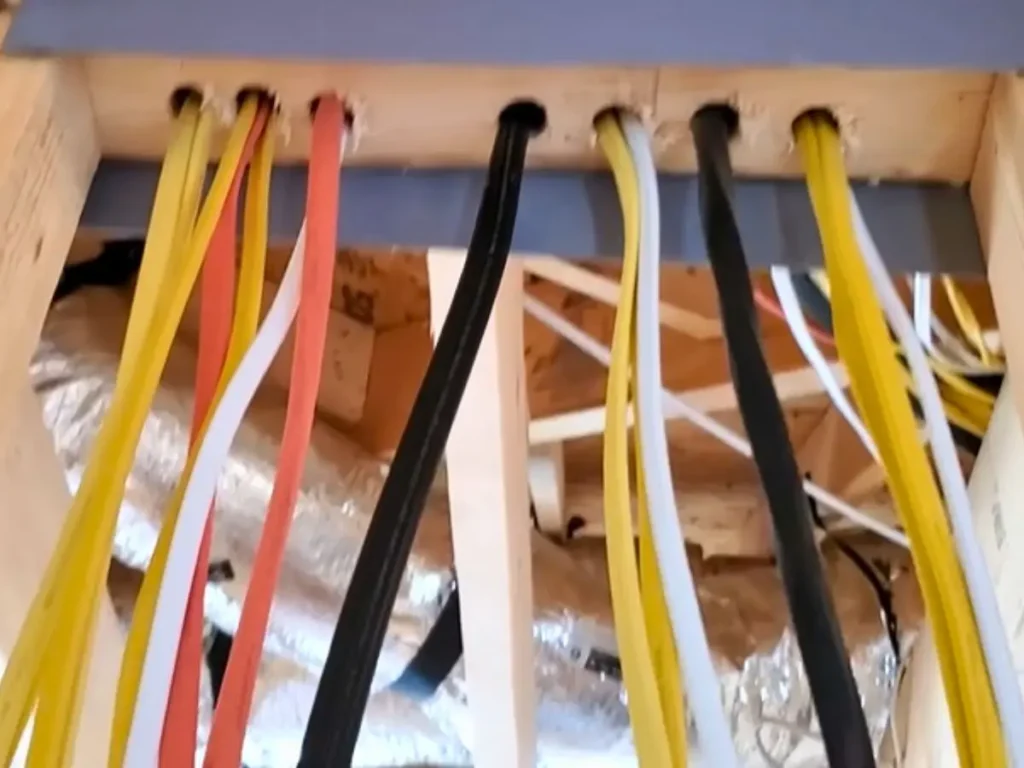
Running Romex cable through floor joists is crucial in home electrical wiring projects. Whether you’re a DIY enthusiast, a homeowner tackling a DIY electrical project, or a professional electrician, knowing how to run Romex correctly ensures safety and compliance with electrical codes.
In this comprehensive guide, we’ll cover everything you need to know about running Romex through floor joists. You’ll learn the basics of Romex wiring, discover troubleshooting tips, and explore best practices for installation. By following these detailed steps, you’ll improve your wiring skills and ensure the safety and longevity of your electrical projects.
Optimize your home electrical wiring with this essential guide on running Romex through floor joists!
Understanding Romex Through Floor Joists Wiring
Before beginning the installation process, it’s crucial to understand Romex wiring, a popular choice in residential electrical systems. Romex wiring features a non-metallic sheathed cable containing multiple conductors. Its flexibility and ease of installation make it ideal for running electrical power through walls and ceilings.
Knowing the different types of Romex, like those designed for indoor or outdoor applications, and selecting the proper gauge for various electrical loads ensures safe and efficient home wiring projects. Learn how to work with Romex wiring to improve your home’s electrical efficiency and safety.
What Is Romex Wiring?
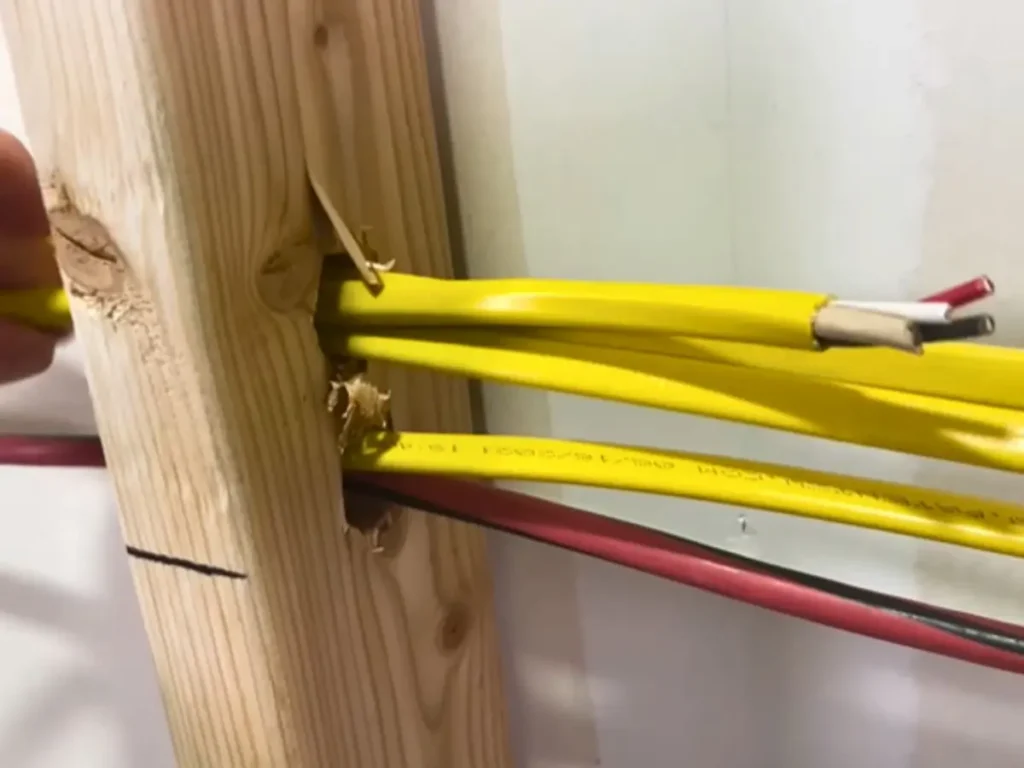
Romex cables are a top choice for residential electrical wiring projects due to their flexibility and durability. These non-metallic sheathed cables are favored by homeowners and electricians alike. Their flexibility allows Romex cables to bend easily, fitting into tight spaces better than rigid metal conduits.
Their durability ensures they perform reliably, even in environments with moisture exposure. Ease of installation is another advantage; Romex cables can be quickly installed through walls and floors without specialized tools.
Typically, Romex cables contain multiple insulated wires—hot, neutral, and ground wires—all enclosed in a protective plastic sheath. This design provides added safety against electrical malfunctions. Romex cables are an efficient and reliable solution for residential wiring needs.
Types of Romex Cables
Romex cables are a top choice among electricians and builders thanks to their versatility and availability in various sizes and specifications. Designed for a wide range of electrical applications, Romex cables are popular for many projects. Here’s a breakdown of common Romex cable types:
- 14/2 Romex Cable: Perfect for lighting circuits and low-power applications, the 14/2 Romex is ideal when only a light load is required.
- 12/2 Romex Cable: Widely used for outlet wiring and general household appliances, this cable handles regular household currents and is a staple in residential construction.
- 10/3 Romex Cable: This cable is excellent for higher power circuits, making it suitable for appliances that need more electricity, such as air conditioners and water heaters.
When choosing Romex cables, it’s crucial to select the right type for your power needs and ensure compliance with local electrical codes. Properly selecting and installing Romex cables ensures safety and efficiency in any electrical system.
Typical Applications of Romex Wiring
Romex is famous for indoor wiring projects because of its versatility and easy installation. It is widely used in various electrical applications, including:
- Powering outlets and lighting circuits: Romex wire is perfect for powering wall outlets and lighting fixtures in homes, ensuring a stable and reliable power supply.
- Connecting appliances like dishwashers and HVAC systems with its durable design, Romex is well-suited for connecting major household appliances like dishwashers and HVAC systems to the electrical grid, promoting safe and efficient operation.
- Wiring through walls, floors, and ceilings: Romex’s flexibility and protective sheath make it an excellent option for wiring that needs to pass through walls, floors, and ceilings in residential buildings. It is ideal for both new construction and renovation projects.
Romex wire is recognized for its role in residential electrical wiring, making it a go-to solution for electricians and homeowners alike.
Advantages and Disadvantages of Using Romex
Advantages of Residential Wiring:
- Simple installation and adaptable for most home applications.
- Affordable alternative to other types of wiring systems.
- Minimal tools are needed for easy handling and setup.
Disadvantages of Residential Wiring:
- Only suitable for indoor use due to lack of moisture and UV resistance.
- Prone to physical damage if not adequately shielded during installation.
Optimize your residential wiring decisions by understanding these pros and cons.
Pre-Installation Considerations for Romex Through Floor Joists
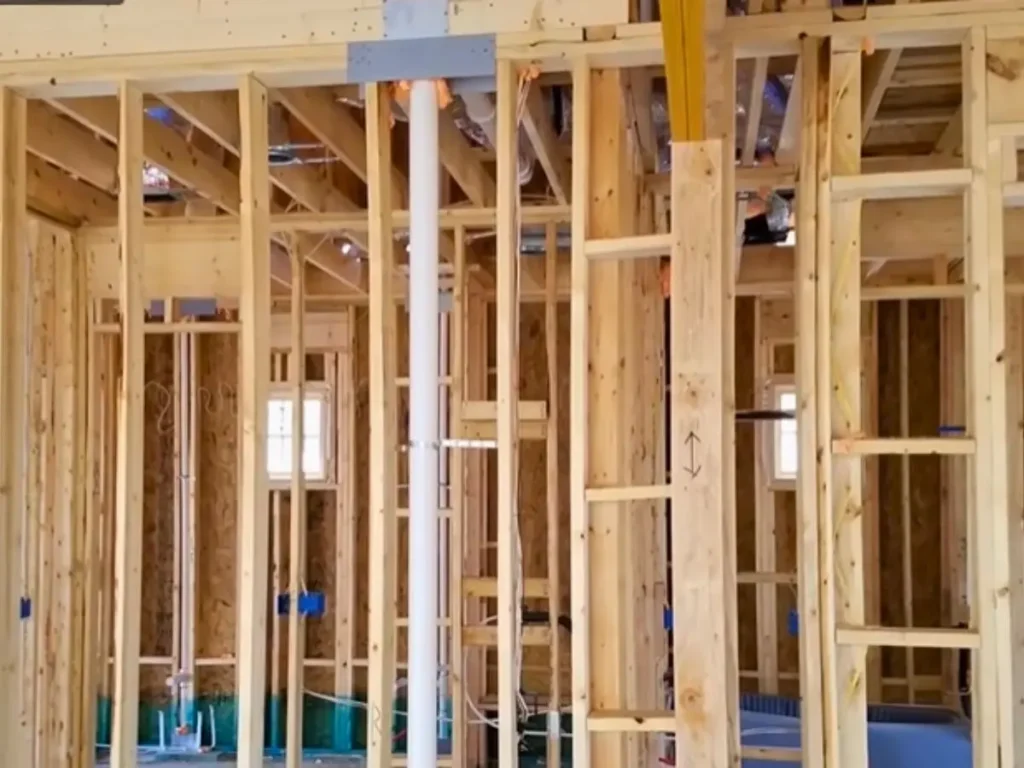
Proper preparation is essential for a successful Romex cable installation, ensuring safety and efficiency. Here’s a step-by-step guide to help you get started. First, gather all the necessary tools and materials, such as wire cutters, wire strippers, and electrical connectors.
Next, review the electrical code requirements to ensure compliance and choose the right cable size for your project. Plan the routing path carefully to avoid obstacles and reduce bends, which can impact cable performance.
Lastly, always confirm that the power is switched off at the breaker to prevent electrical accidents. These steps will help you achieve a safe and effective Romex cable installation.
Assessing Your Wiring Needs
To optimize your electrical wiring project, start by identifying its purpose. Are you planning to connect new electrical outlets, install home lighting, or hook up a large appliance? Understanding your specific electrical needs is crucial.
This knowledge dictates the type and gauge of Romex cable you require and influences other decisions, such as wiring layout and electrical safety measures.
Wiring new outlets may need a different strategy than installing lighting fixtures, and each appliance may have unique electrical demands. Considering these factors ensures efficiency and safety in your home electrical projects.
Tools and Materials Checklist
Before you get hands-on, gather all the necessary tools and materials:
- Appropriate Romex cable type
- Power drill and spade or auger bits
- Cable staples and protective plates
- Electrical boxes
- A stud finder and measuring tape
- Voltage tester and screwdriver set
Planning Your Route: Factors to Consider
Trace the path where the cable will run through the joists. Consider:
- Avoiding sharp bends in the cable is crucial to prevent damage and ensure optimal performance. Sharp bends can weaken the cable, leading to potential failures or degraded signal quality.
- Minimizing interference with plumbing or HVAC systems is vital for maintaining the integrity of the cabling and the surrounding systems. Interference can cause operational disruptions or safety hazards, so careful planning and installation are necessary.
- Accounting for accessibility for future maintenance ensures that any necessary repairs or upgrades can be performed efficiently. This involves strategically placing and routing cables to allow easy access without disrupting other systems or structures.
Local Building Codes and Regulations
Local building and electrical codes are crucial for wiring projects. They ensure safety and compliance with all installations, prevent electrical hazards, and ensure systems are installed correctly and efficiently.
It’s essential to consult your local jurisdiction or a licensed electrician to verify that your electrical installation meets all requirements. They provide valuable guidance and help navigate complex electrical regulations that may apply to your project.
This ensures your work adheres to the highest electrical safety and functionality standards. Always align with local building codes and consult professionals for reliable electrical installations.
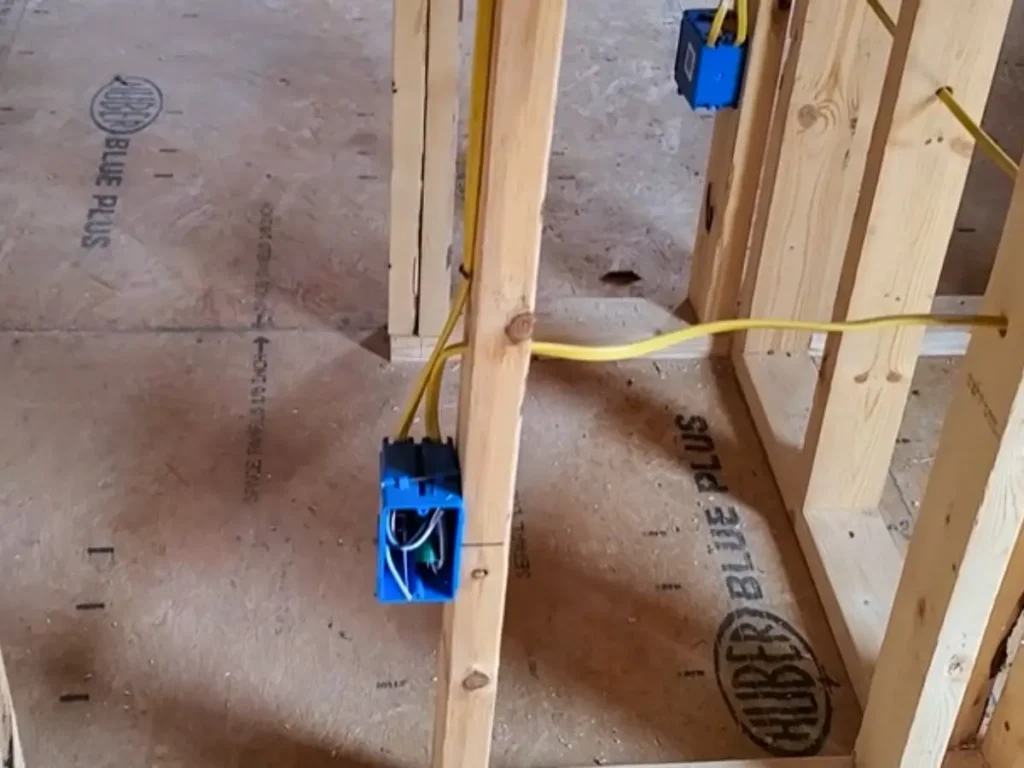
Safety and Compliance for Romex Through Floor Joists
Safety must be the top priority in any electrical project. Always wear protective gear, ensure all equipment is properly grounded, and double-check all connections before powering up.
These precautions help prevent accidents and ensure a successful project outcome. Prioritize electrical safety to protect yourself and achieve reliable results.
Essential Safety Precautions
- First, ensure your safety by turning off the power supply to the area where you’ll be working. This is crucial to prevent any accidental electrical shocks.
- After turning off the power, it’s essential to use a voltage tester to confirm that no electricity is flowing into the area. Double-checking with a tester helps avoid any potential hazards.
- When working with electrical components, always wear appropriate protective gear. This includes insulated gloves to protect your hands from electrical currents and safety glasses to shield your eyes from debris or sparks. Safety should always be your top priority.
Understanding Code Compliance
Adherence to the National Electrical Code (NEC) and local regulations is essential for ensuring the safety and compliance of your electrical project. Following specific guidelines helps prevent electrical hazards. Here are some crucial tips:
- When drilling holes into joists, maintain a minimum distance of 1-1/4 inches from the edge. This safety measure prevents damage from nails or screws, which can lead to electrical failures or fires if they penetrate the wiring.
- Secure Romex cables are widely used for residential wiring to prevent sagging or connection stress. According to the NEC, these cables should be fastened every 4.5 feet and within 12 inches of electrical boxes for stability and reduced risk of accidents.
By strictly adhering to these electrical safety standards, you can protect your systems from costly repairs and dangerous incidents. Prioritize electrical safety and project compliance with these best practices!
Importance of Inspections and Professional Guidance
Hiring a professional electrician is brilliant if you need clarification on your electrical installation. Electricians have the expertise to evaluate your setup thoroughly.
Certified electrical inspections ensure your work meets code requirements and is safe for long-term use. Investing in professional electrician services provides a reliable and secure electrical system. For peace of mind and safety, always consult a licensed electrician.
Common Mistakes to Avoid During Installation
- Over-drilling or weakening the structural integrity of joists can cause major structural problems, affecting safety and stability.
- Running excessive cables through a single hole may cause overheating, increase the risk of electrical fires, and reduce system efficiency.
- Failing to install protective plates where necessary can result in damage to pipes and wires from nails or screws, leading to expensive repairs and potential safety hazards.
Running Romex Through Floor Joists – Step-by-Step Guide
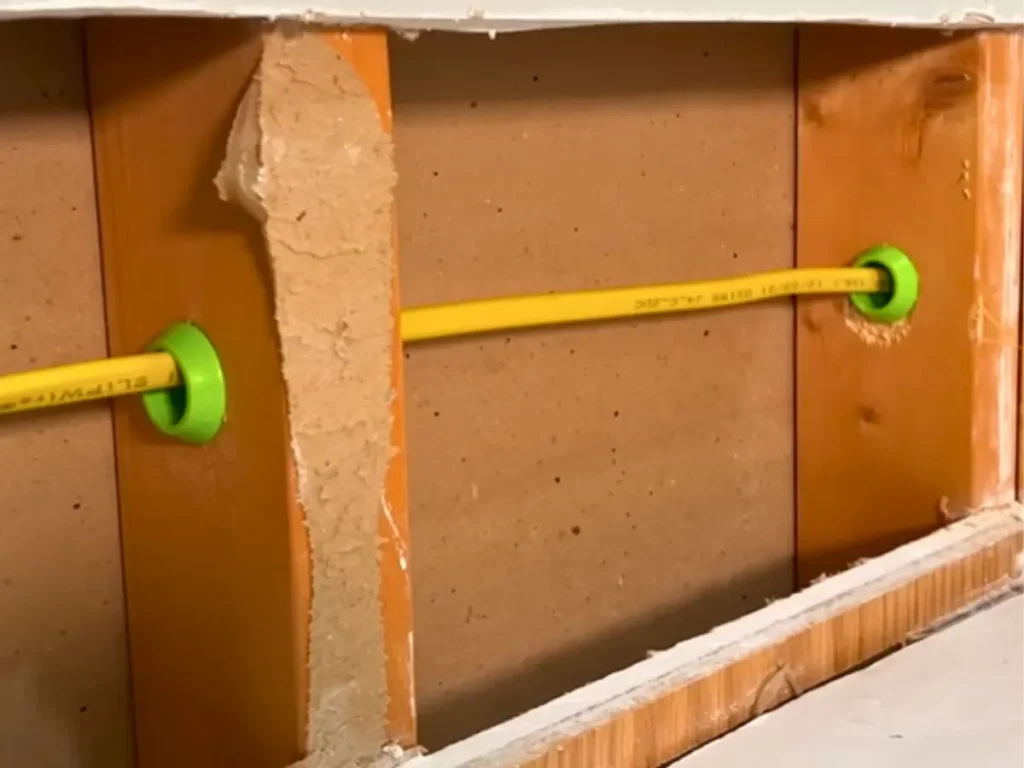
Here’s how to safely and effectively run Romex through floor joists. First, ensure you have the proper tools, such as a drill with a suitable bit and a tape measure. Identify the path for the Romex, avoiding any pipes or other obstacles.
Drill holes through the center of the joists, maintaining at least 1 1/4 inches from the edge to prevent damage. Gently feed the Romex through these holes, taking care not to kink or damage the wire. Finally, secure the Romex with appropriate staples, ensuring it remains snug but not too tight, allowing some movement.
Identifying Starting and Ending Points
Start by identifying the starting point at the electrical box, ensuring it’s clearly labeled and accessible. Next, specify the endpoint where the cable connects to the device, ensuring it’s positioned for the best connection and functionality.
Double-check both locations for obstacles that could hinder cable installation. For better visibility in search results, remember to use terms like “electrical box,” “cable connection,” and “installation process.”
Drilling Holes Safely
Use a power drill with a spade or auger bit to efficiently and safely drill through floor joists. Ensure the holes are drilled carefully, adhering to building code regulations, and evenly spaced for a neat layout.
This precision helps with the installation of wiring or piping and enhances the structural integrity and appearance of the project. Remember the old saying: measure twice, drill once, to avoid costly mistakes. Using these tips, improve your home improvement and DIY project outcomes with ease and expertise.
Protecting and Securing the Romex Cable
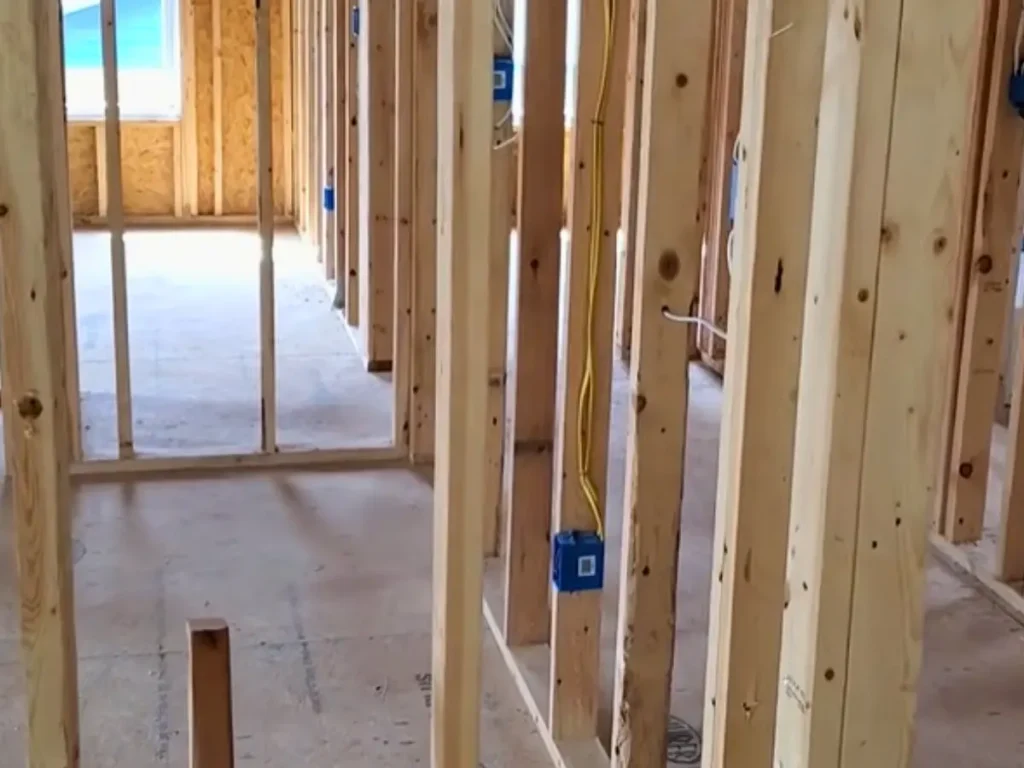
Gently guide the Romex cable through the drilled holes, keeping a steady hand. This step is critical to avoid damaging the cable insulation, which can cause electrical hazards or future functional issues. Ensure the cable is fed smoothly and check periodically to confirm it stays intact. Handling Romex cables carefully and preventing insulation damage is essential for safe electrical wiring.
Running the Cable Through the Holes
Pull the cable through the holes, ensuring no kinks or sharp bends might damage its integrity. Maintaining a smooth curve helps prevent cable damage or wear over time.
Double-check the cable path to ensure it’s clear of obstructions, allowing it to lay flat. Proper cable management and installation are critical to long-lasting performance.
Securing the Cable Properly
Secure Romex cables to joists using cable staples to ensure compliance with electrical code requirements. Space the staples properly to maintain electrical safety standards. Carefully attach the cable without pinching or damaging the insulation.
Ensure the cable is flat and follows a tidy path along the joists. This helps ensure electrical safety and maintains a professional appearance in your wiring setup. Proper Romex installation reduces fire hazards and enhances the durability of your electrical system.
Installing Protective Plates
To prevent accidental damage during construction or renovations, installing protective metal plates over areas where electrical wires or data cables run through wall studs is highly recommended. These protective plates serve as a shield, protecting cables from nails or screws that might puncture and damage them.
Consider placing these protective plates near potential penetration points, such as areas following plumbing or HVAC installations. This ensures cable protection and preserves the integrity of your wiring throughout the structure.
Implementing these safety measures is crucial for maintaining safe and efficient electrical and data systems in your home or building.
Best Practices for Running Romex in Tight Spaces
Use fish tape or flexible rods for seamless guidance when installing cables in tight or hard-to-reach areas. These essential cable installation tools help navigate complex spaces, preventing cables from snagging or getting caught.
Using fish tape or flexible rods saves you time and effort, ensuring smooth and efficient cable installation. Optimize your cable installation process with these must-have tools for any electrician or DIY enthusiast.
Troubleshooting Common Installation Challenges
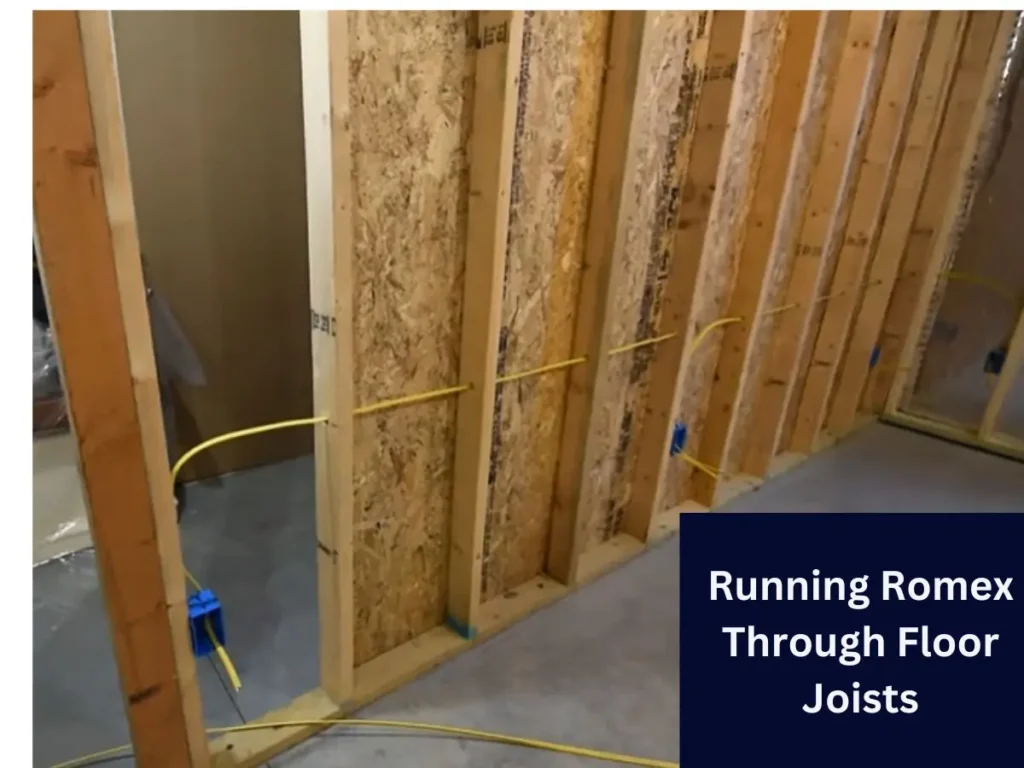
Dealing with Obstructions in Joists
For drilling in tight or hard-to-reach spaces, use offset drill bits or flexible drill extensions to navigate obstacles easily. Offset drill bits are perfect for creating angled holes without damaging nearby surfaces.
Meanwhile, flexible drill extensions help you reach around corners or confined areas, ensuring precision in your DIY projects. These tools are essential for efficient and precise drilling, improving your workflow and results.
What to Do If Your Drill Bit Isn’t Long Enough
Enhance your project capabilities using longer drill bits, which are perfect for reaching deeper or tackling challenging tasks. Drill from both sides for better precision and alignment, especially with thicker materials.
This drilling technique ensures greater control and accuracy, making your work efficient and precise. Optimize your DIY projects with these expert drilling tips today!
Solutions for Running Romex in Unfinished Spaces
Protecting cables in conduits is crucial for safety and organization in open or unfinished spaces. Conduits keep cables safe from physical damage and environmental factors, ensuring durability.
Additionally, they help maintain a tidy and visually appealing space. Securely housing cables in conduit reduces the risk of accidental damage or wear over time. Use conduit to safeguard and organize your electrical systems for effective cable management.
Tips and Best Practices for Running Romex Through Floor Joists
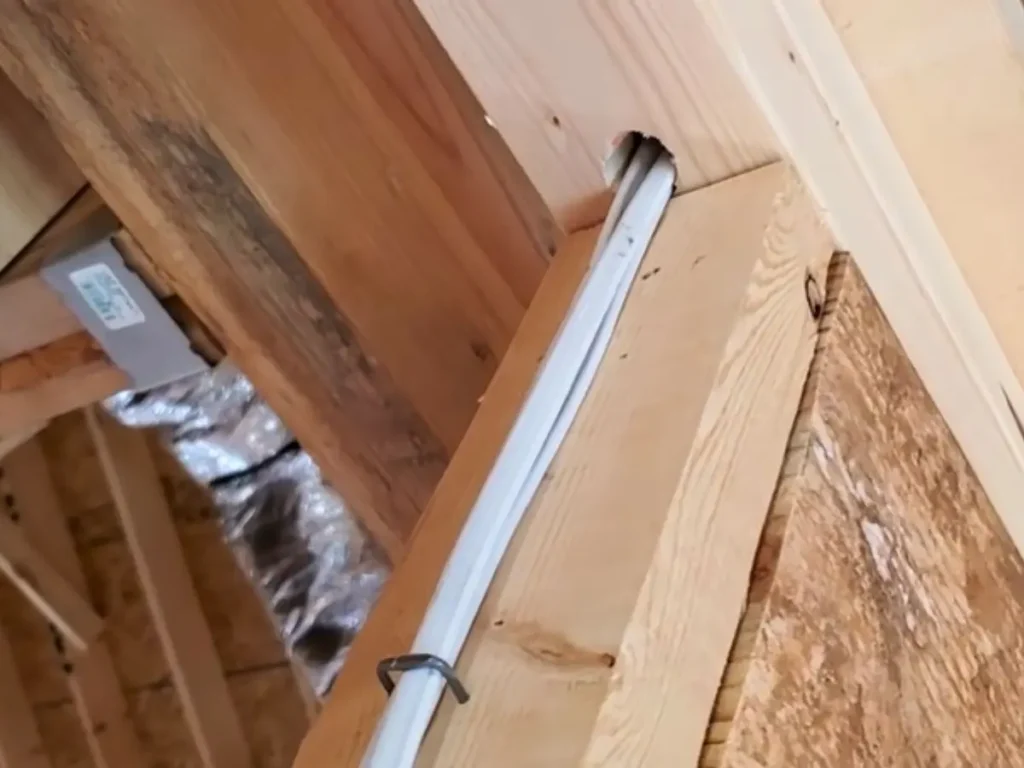
Plan Thoroughly and Document Your Work
Proper planning and documentation are essential for successful cable installation and management. By documenting your cable work, you can efficiently track cable routes, making future troubleshooting much more accessible.
A thorough planning ensures all necessary safety measures are in place before drilling or wiring tasks, preventing potential hazards and mistakes. Use these cable installation strategies for effective cable management and improved project outcomes.
Use the Right Tools for the Job
The right tools are essential for any DIY project, especially for efficient cable installation. Use a high-quality drill, drill bits, fish tape, and a staple gun to ensure precision.
Regular maintenance of your tools enhances their longevity and performance for future projects. Choosing the appropriate tools for your DIY needs guarantees professional results every time. Prioritize using quality tools for successful home improvement and DIY projects.
Label Your Wiring for Future Reference
Labeling cable routes and connections is essential for easy maintenance and renovations. Proper cable labeling helps troubleshoot and prevents confusion or damage during repairs or upgrades. Clear cable labels accurately identify wires, circuits, and connection points.
Labeling your wiring system ensures long-term safe, efficient, and organized electrical management. Optimize your electrical setup with accurate cable labeling today!
Avoid Overcrowding Boxes and Cables
Overcrowded electrical boxes and tangled cable bundles are common issues that can cause overheating and pose potential fire hazards. Effective cable management is crucial for preventing these dangers.
To ensure safety, space out wires correctly and avoid cramming them into tight spaces. Opt for larger junction boxes or split cables into multiple smaller bundles for better organization.
Properly prioritizing cable management can prevent hazardous situations and ensure efficient and safe electrical operation. Use these tips to improve safety and optimize electrical systems in your home or business.
Support the Cable Properly to Prevent Damage
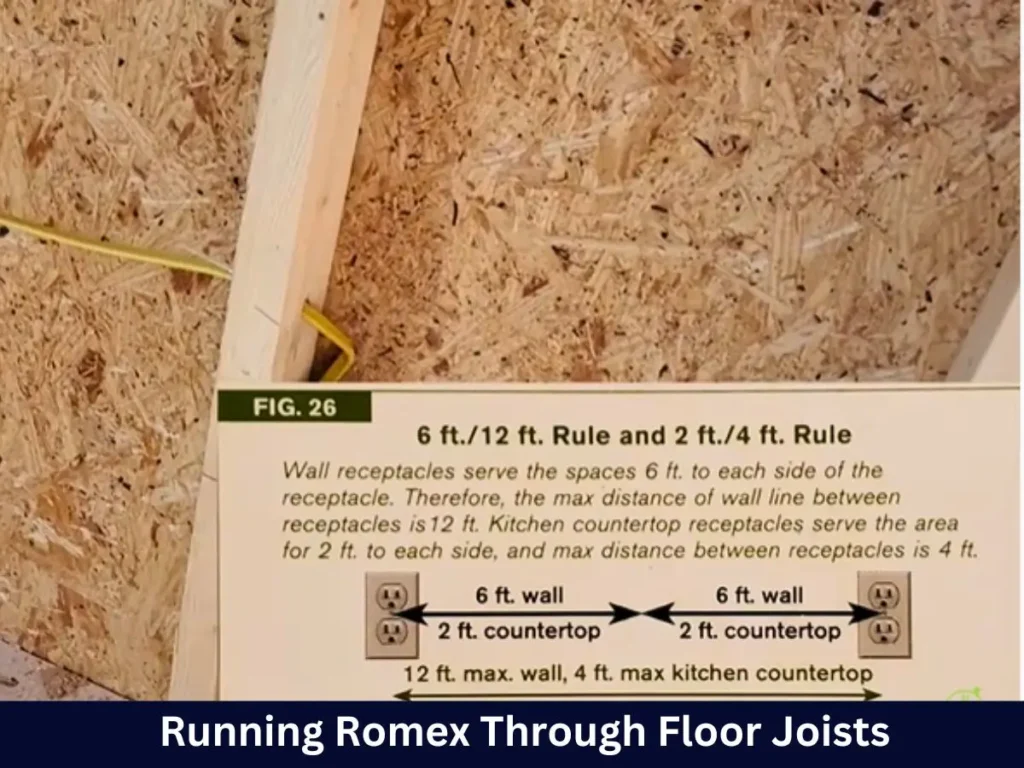
Ensuring proper cable support prevents issues like sagging, bending, and other cable damage. For effective cable management, securely fasten cables to studs or joists with cable staples or clamps.
Excessive pulling on cables can lead to long-term damage. By supporting your wiring system correctly, you ensure its longevity and reduce the risk of potential hazards from damaged wires. Follow these cable installation tips for successful and safe cable management.
Respect Electrical Codes and Standards
Ensuring safe and legal Romex installation requires adherence to electrical codes and standards. These regulations are essential for creating secure, reliable electrical systems in buildings and reducing the risk of electrical accidents and hazards.
Stay updated with local and national electrical codes to ensure your project meets all safety and legal requirements. By following these electrical standards, you prioritize safety and compliance, protecting yourself and others. Proper Romex wiring and code compliance are crucial for any electrical project.
Double-Check Your Work Before Finalizing
Before starting any wiring project, double-check your work to ensure accuracy and safety. Verify that all electrical connections are secure and that wires are intact and not exposed. Always use a voltage tester to confirm the power is off before handling cables.
By taking these safety precautions, you ensure the successful completion of your DIY wiring projects, avoid potential electrical hazards, and guarantee efficient operation. Safe DIY electrical work leads to long-lasting results and peace of mind.
Final Checks and Inspections
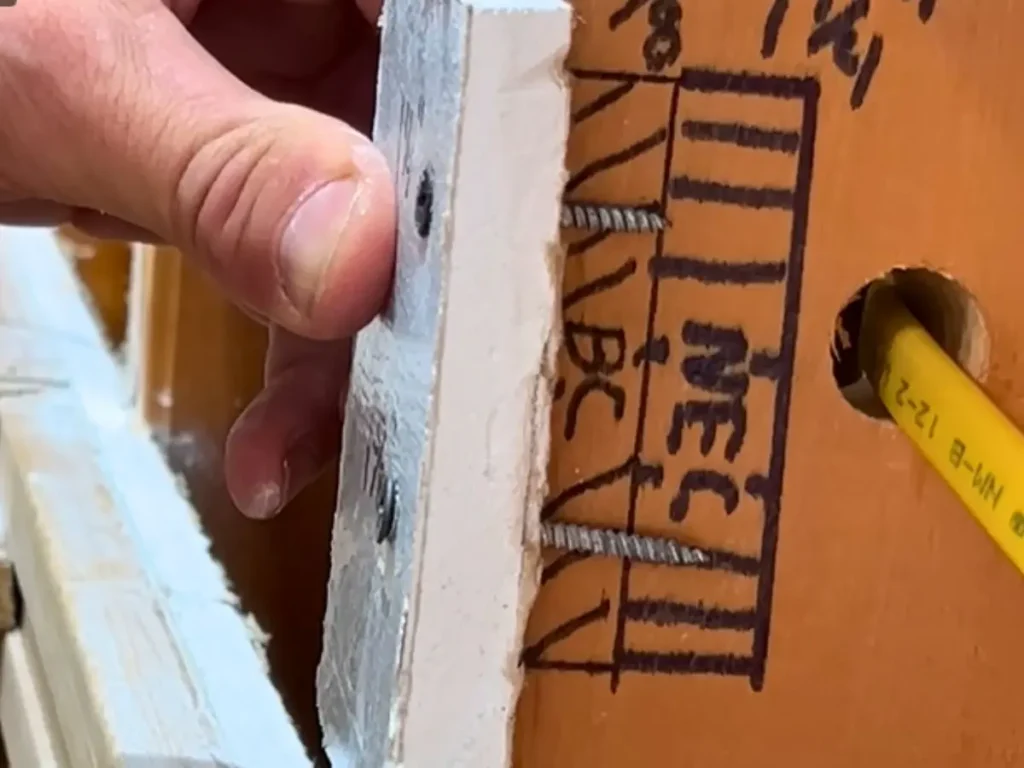
Inspect Your Work for Compliance and Safety
Before finishing your project, ensure all electrical connections and wiring are installed correctly and safely. Check each wire to confirm it is properly connected to its terminal, with no loose or misplaced wires.
Make sure there are no exposed wires that could cause electrical shock or fire hazards. Inspect each connection point, looking for quality insulation around the wires. Double-check that all cable fastenings are secure and compliant with electrical codes and safety standards.
Meticulous attention to detail in electrical safety and installation is crucial for preventing future problems and preserving the electrical system’s integrity.
Electrical Panel Inspection: Guaranteeing Secure Connections
Organize and label all wires in the electrical panel for easy identification and maintenance. Zip ties or cable clips keep wires neat, preventing accidental damage or disconnection during future maintenance.
Ensure each wire is securely and correctly connected to its corresponding breaker in the electrical panel. Proper wire management and electrical panel organization ensure clear communication and avoid confusion during troubleshooting. Keep your electrical system safe and efficient with these wire organization tips.
Importance of Professional Inspections Post-Installation
Ensuring the safety and compliance of your electrical system starts with connecting a professional electrician for an inspection. A licensed electrician can spot potential hazards and code violations that might be missed during installation.
This professional inspection guarantees safety and brings peace of mind, knowing an expert has thoroughly checked and approved your electrical system. Don’t compromise safety—prioritize professional electrical inspections.
Even if you’re confident in your DIY skills, having a licensed electrician review your work before marking it complete is bright for safety and compliance.
Wrapping It Up
Running Romex through floor joists is essential for anyone involved in home electrical projects. This skill ensures safe and efficient electricity distribution in a building. For a successful and secure installation, choosing the correct Romex cable type and gauge is crucial, as well as following safety practices like de-energizing circuits and adhering to electrical code compliance to avoid violations.
Whether working on a DIY home project or helping a client with their home renovation, this comprehensive guide is your go-to resource. It covers planning the route, measuring and cutting the Romex, securing it with staples, and connecting junction boxes.
Paying close attention to these steps can achieve a professional-quality, lasting electrical installation. Keywords: Romex installation, home electrical projects, electrical safety, code compliance, DIY electrical work, home renovation.
Conclusion
Now that you understand Romex installation through floor joists, you can confidently tackle your next electrical project. Start by planning thoroughly and labeling your wiring to keep it organized. Avoid overcrowding in electrical boxes, and ensure you prioritize professional inspections.
By following these tips and best practices, you can achieve safe, efficient, and compliant electrical installations. Remember always to prioritize safety and enjoy your DIY electrical projects! Make your home brighter with properly installed Romex wiring. Happy drilling, and enjoy your DIY electrical endeavors!
Frequently Asked Questions (FAQs)
Cable staples should be spaced at least four and a half feet apart, following the direction of the cable's route. If the cable changes direction, add a staple within 12 inches of the turn.
No, running Romex parallel to plumbing pipes is not recommended. The National Electrical Code (NEC) requires a minimum of six inches of separation between electrical wires and pipes to avoid potential hazards.
The NEC doesn't specify the number of cables allowed in an electrical box. However, overcrowding can cause overheating and fire hazards. Hence, following the manufacturer's instructions and local codes is essential to decide how many cables can fit safely in a specific electrical box size.
If your electrical work needs to be up to code, consult a licensed electrician for an inspection. They can spot issues and advise on complying. Address potential hazards proactively; don't wait for problems. Remember, electricity is dangerous, so always prioritize safety.
Improper installation of Romex wiring can lead to electrical hazards and code violations, posing safety risks and potentially resulting in costly repairs or fines. Insurance may deny coverage for damages from faulty DIY electrical work. To avoid these issues, prioritize safety and proper installation.
Related Posts
-
 15 Dec 2024 RemodelHow to Raise a Shower Floor: Essential Tips
 -
 15 Dec 2024 Remodel70s Kitchen Remodel Before and After Expert Tips
 -
 14 Dec 2024 RemodelThe Ultimate Guide to a Raised Bathroom on a Concrete Slab
 -
 30 Nov 2024 RemodelAverage Kitchen Remodel Cost: Unlimited Tips
 -
 25 Nov 2024 RemodelRunning Romex Through Floor Joists: A Comprehensive Guide
 -
 22 Nov 2024 RemodelDuctwork Between Floor Joists |10 Easy Ways to Installation
 -
 21 Nov 2024 RemodelFloating Floor Meets Exterior Door Threshold | Expert 10 Tips
 -
 20 Nov 2024 RemodelExpert's 10 Tricks on How To Attach Floor Joists To Sill Plate
 -
 18 Nov 2024 RemodelTop 10 Solution | What to Do With Fake Dormer Windows
 -
 16 Nov 2024 Remodel10 Tips for How to Finish Underside of Kitchen Cabinets

